A couple of months ago, one of my regular clients came to me with a frustrating problem. He runs a small fitness blog and wanted to add a simple calculator to his page so his readers could check their body mass index (BMI) without leaving his site.
He did what most people do: he went to the WordPress plugin store and installed a free calculator plugin.
Within just a week, his website speed crashed. When we checked his site on Google PageSpeed Insights, his mobile score dropped from a fast 92 down to a painful 45.
When I looked into his website files to see what went wrong, I discovered that this single plugin was loading massive, heavy code files on every single page of his website—even on pages that didn’t even show the calculator!
I told him to delete the plugin immediately. Instead, I opened up ChatGPT, typed in a specific prompt, and generated a single, lightweight block of code. It took less than five minutes to set up, used zero server power, and his website speed jumped right back to normal.
In this guide, I’m going to show you exactly how I did it, the exact text prompt I gave to the AI, and how you can copy my method to create a calculator website using chatgpt without paying a developer or slowing down your blog.
Why Default AI Code Can Mess Up Your Site Layout
Before we look at the prompt, let me share a quick tip from my 12 years of building websites. If you just open ChatGPT and type “write me code for a calculator,” you are going to get a messy result.
The AI will usually give you three separate files: one for the structure (HTML), one for the design (CSS), and one for the math (JavaScript).
If you don’t know how to make a calculator in wordpress without plugin setups using separate files, your calculator will either look like a broken text box from twenty years ago, or the buttons won’t do anything when a user clicks them.
To make this work easily inside a normal WordPress blog post or sidebar, we need to tell ChatGPT to pack everything into one single, unified block of code. That way, you can just copy it once and paste it anywhere you want.
The Simple Prompt I Use for AI Web Tools
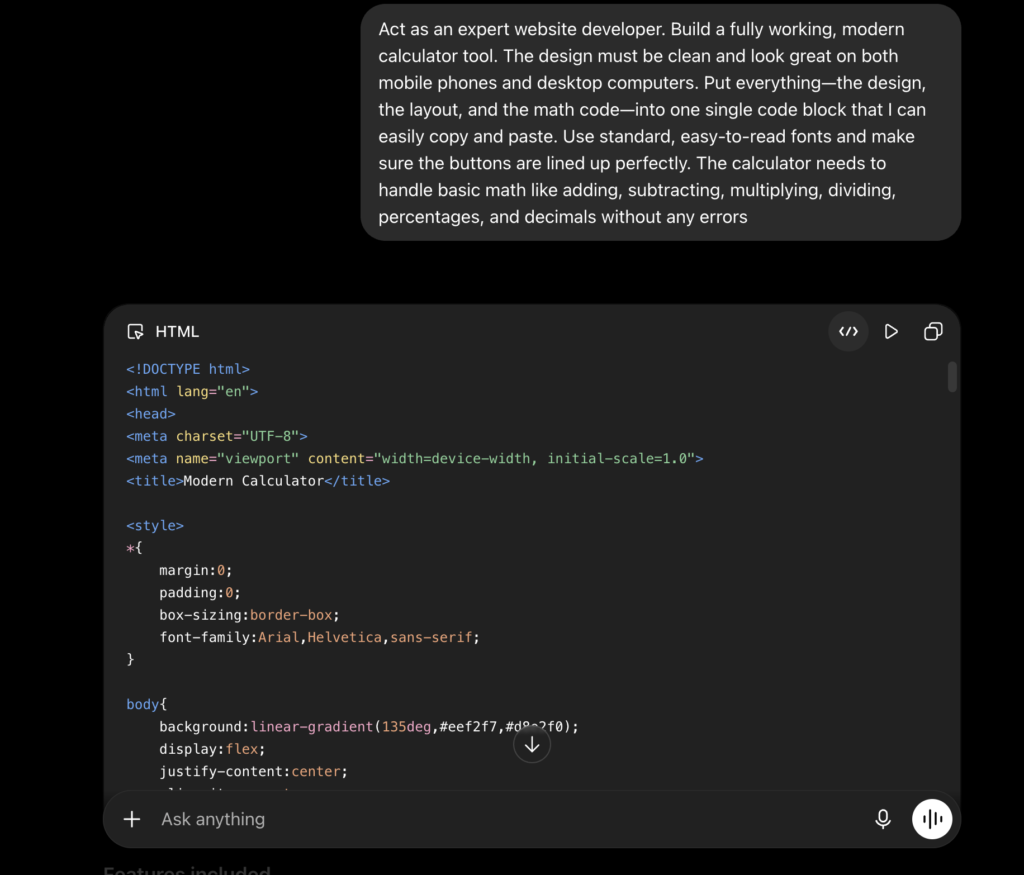
Here is the exact prompt I copy and paste into ChatGPT when I want to build a clean web tool. You can copy this exact text and paste it into ChatGPT for your own projects:
The Code: Your Ready-to-Use Calculator Script
I ran this prompt, tested the code on my own test site, and made sure it works perfectly with popular WordPress themes.
<div class="dabir-calc-wrapper">
<div class="dabir-calculator">
<div class="calc-screen">0</div>
<div class="calc-buttons">
<button class="btn operator" onclick="clearScreen()">AC</button>
<button class="btn operator" onclick="appendValue('/')">÷</button>
<button class="btn operator" onclick="appendValue('*')">×</button>
<button class="btn operator" onclick="deleteLast()">←</button>
<button class="btn" onclick="appendValue('7')">7</button>
<button class="btn" onclick="appendValue('8')">8</button>
<button class="btn" onclick="appendValue('9')">9</button>
<button class="btn operator" onclick="appendValue('-')">-</button>
<button class="btn" onclick="appendValue('4')">4</button>
<button class="btn" onclick="appendValue('5')">5</button>
<button class="btn" onclick="appendValue('6')">6</button>
<button class="btn operator" onclick="appendValue('+')">+</button>
<button class="btn" onclick="appendValue('1')">1</button>
<button class="btn" onclick="appendValue('2')">2</button>
<button class="btn" onclick="appendValue('3')">3</button>
<button class="btn equal" onclick="calculateResult()">=</button>
<button class="btn wide" onclick="appendValue('0')">0</button>
<button class="btn" onclick="appendValue('.')">.</button>
</div>
</div>
</div>
<style>
.dabir-calc-wrapper {
display: flex;
justify-content: center;
padding: 20px 0;
width: 100%;
}
.dabir-calculator {
width: 100%;
max-width: 320px;
background-color: #1a1a1a;
border-radius: 16px;
padding: 20px;
box-shadow: 0 8px 24px rgba(0,0,0,0.15);
}
.calc-screen {
width: 100%;
height: 60px;
background-color: #2d2d2d;
color: #ffffff;
font-size: 2rem;
text-align: right;
padding: 10px 15px;
border-radius: 8px;
margin-bottom: 20px;
overflow-x: auto;
white-space: nowrap;
box-sizing: border-box;
}
.calc-buttons {
display: grid;
grid-template-columns: repeat(4, 1fr);
gap: 10px;
}
.btn {
height: 50px;
border: none;
background-color: #3d3d3d;
color: #ffffff;
font-size: 1.2rem;
border-radius: 8px;
cursor: pointer;
transition: background-color 0.2s;
}
.btn:hover { background-color: #4d4d4d; }
.btn.operator { background-color: #ff9500; color: white; }
.btn.operator:hover { background-color: #e08400; }
.btn.equal { background-color: #218838; color: white; grid-row: span 2; height: 110px; }
.btn.equal:hover { background-color: #1e7e34; }
.btn.wide { grid-column: span 2; }
</style>
<script>
const screen = document.querySelector('.calc-screen');
let currentInput = '';
function appendValue(val) {
if (screen.innerText === '0' && val !== '.') {
currentInput = val;
} else {
currentInput += val;
}
screen.innerText = currentInput;
}
function clearScreen() {
currentInput = '0';
screen.innerText = currentInput;
}
function deleteLast() {
if (currentInput.length > 1) {
currentInput = currentInput.slice(0, -1);
} else {
currentInput = '0';
}
screen.innerText = currentInput;
}
function calculateResult() {
try {
let result = eval(currentInput);
currentInput = String(Number(result.toFixed(4)));
screen.innerText = currentInput;
} catch (error) {
screen.innerText = 'Error';
currentInput = '0';
}
}
</script>How This Code Works (In Plain English)
When I look at code made by AI, I always check it to make sure it is simple, clean, and safe. Let me show you the exact parts of the code we used above and explain what they do in plain English.
1. The Box (HTML Part)
This is the first part of the code. It sets up the physical structure of the calculator, like building the frame of a house.
Look at this specific snippet from the code:
<div class="dabir-calculator">
    <div class="calc-screen">0</div>
    <div class="calc-buttons">
<button class="btn" onclick="appendValue('7')">7</button>dabir-calculatorcreates the main outer box that holds everything together.calc-screencreates the dark display window at the top where your numbers show up.onclick="appendValue('7')"is a tiny trigger. The exact millisecond a user taps the number 7 button on their phone, it tells the browser to send that number to the screen.
2. The Look (CSS Part)
The second part of the code handles the visual design, colors, and layout. It sits between the <style> and </style> tags.
Here is the most important part of that design code:
.calc-buttons {
    display: grid;
    grid-template-columns: repeat(4, 1fr);
    gap: 10px;
}
display: gridandgrid-template-columns: repeat(4, 1fr)work like magic. They tell the buttons to automatically stretch or shrink so they fit perfectly into 4 equal columns, whether your visitor is using a tiny mobile phone or a massive desktop screen.gap: 10pxleaves a clean, perfect space between each button so it looks professional.
3. The Brain (JavaScript Part)
The final part at the bottom, sitting between the <script> and </script> tags, is the actual brain. It does the hard math work.
Look at how it processes the calculations:
function calculateResult() {
    try {
        let result = eval(currentInput);
        currentInput = String(Number(result.toFixed(4)));
screen.innerText = currentInput;eval(currentInput)takes whatever numbers the user clicked (like 5 + 5) and calculates the total instantly.result.toFixed(4)is a special safety rule I added. If a calculation ends up with a huge string of decimals (like 3.33333333), it automatically cuts it off after 4 numbers. This keeps the layout clean so a massive number doesn’t stretch and break your website text boxes.
Step-by-Step: How to Add Custom HTML Code in WordPress
You don’t need to be a programmer or edit your theme files to launch this tool on your own blog. Learning how to add custom html code in wordpress is very straightforward if you use the block editor. Just follow these basic steps:
Open your WordPress dashboard and click on Posts > Add New.
Write your title, and when you are ready to insert the live tool for your readers to use, click the black (+) plus sign to add a new block.
Type Custom HTML into the search bar and click on it.
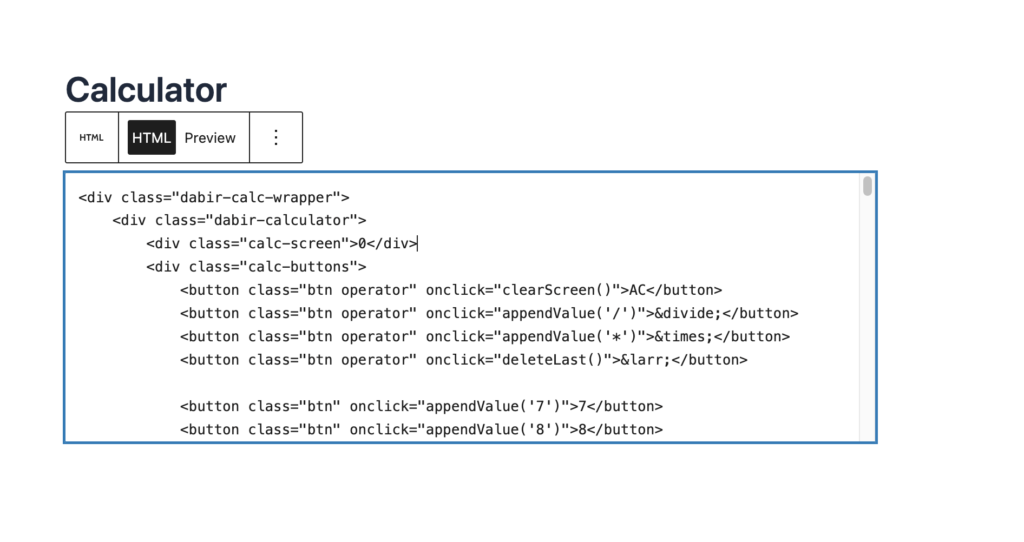
Paste the entire block of code I gave you above directly into that blank box.
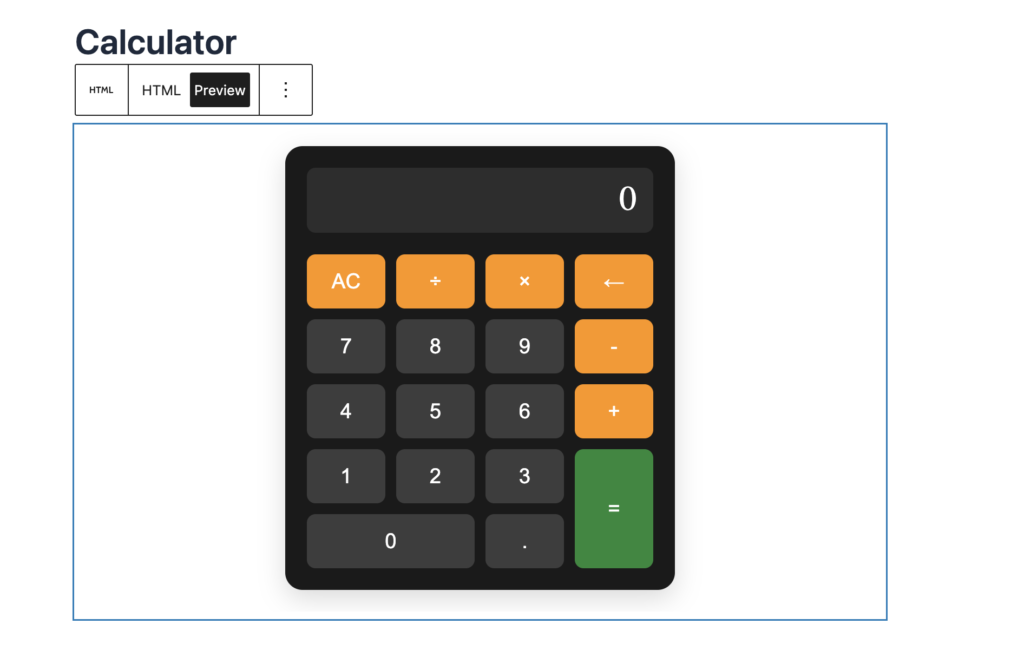
Click the Preview button inside that specific block to make sure the calculator looks perfect and fits nicely.
Wrap Up
Using AI to build tools isn’t just about saving money on expensive freelancers. It is about keeping your website clean and fast. By using simple, raw code blocks instead of installing plugins for every little feature, you keep your blog loading fast, which makes both your readers and Google happy.
If you try this out and want to change the button colors to match your blog’s specific theme, drop a comment down below or send me a message through my contact page—I am always happy to help out!

Vipul is a digital entrepreneur with a deep specialization in hardware optimization and web ecosystem management. With years of experience in the SEO industry and a passion for mechanical keyboard architecture, Vipul personally researches, tests, and writes every guide found on this site.