You have meticulously tuned your stabilizers, lubed every switch to a buttery consistency, and mounted your favorite dense PBT keycaps. Your custom mechanical keyboard is physically perfect.
But when you plug it in, you realize the default 65% layout doesn’t have a dedicated tilde (~) key, or you want the Caps Lock to function as Control when held down. This is where physical hardware meets powerful software.
After configuring and flashed firmware on hundreds of different custom microcontrollers, I can confidently state that mastering keyboard programming is the final frontier of custom keyboard ownership.
While the concept of flashing firmware sounds intimidating, modern software—specifically QMK (Quantum Mechanical Keyboard) and its user-friendly interface, VIA—has made deep customization accessible to everyone.
This technical guide provides a step-by-step framework for remapping keys, configuring powerful layers, and creating complex macros using both the graphical VIA interface and the underlying QMK firmware.
Understanding the Core Philosophy: QMK vs. VIA
Before we dive into the remapping process, it is critical to understand the relationship between these two critical pieces of software.
- QMK (Quantum Mechanical Keyboard): This is the underlying open-source firmware framework. It is extraordinarily powerful, written in C, and requires you to compile your code into a
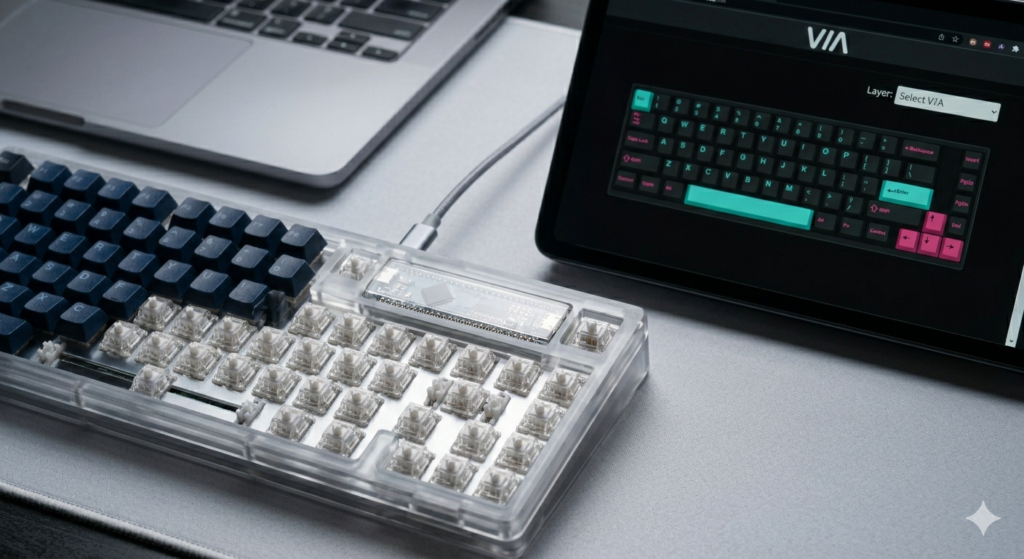
.hexor.binfile and then flash that file onto your keyboard’s microcontroller (like the one visible through the case in image_20.png). It offers unmatched customization, including complex tap-dance keys and leaderboard-style NKRO configuration. - VIA: Think of VIA as QMK’s user-friendly interface. A keyboard must be QMK-compatible and pre-flashed with a special VIA-enabled firmware to work with the software. VIA’s main advantage is compile-less remapping. When you change a key in the VIA interface, the software pushes that change instantly to the keyboard’s EEPROM (memory), requiring no flashing or compilation.
Read Also: Why Material Choice Changes Your Typing Sound”?
Getting Started with VIA: The Instant Remap
If your keyboard is VIA-compatible, this is the most efficient starting point.
- Connect and Authorize: Ensure your keyboard is plugged in. Visit
caniusevia.comor open the standalone VIA application. Authorize the software to access your HID device. Expert Note: If VIA does not recognize your board instantly, you may need to manually load the keyboard’s.jsondefinition file. - The Remapping Interface: VIA displays a physical representation of your keyboard (similar to the image on the laptop screen in image_20.png). Below it is a list of remapping categories (Basic, Media, Macro, Layers).
- The Instant Change: To remap a key, click the physical key on the visualization (e.g.,
Caps Lock), then click the desired function from the categories below (e.g.,Left Control). The change is instant.
Mastering Layers: The Power of Custom Layouts
Layers are why custom keyboards can be so compact. If a physical key (like 1) is held down, it acts as a modifier, revealing a secondary (or tertiary) layout underneath (e.g., F1 becomes available).
- Understanding the Access Codes: To access a layer, you must define a key on Layer 0 (your base layer) with a specific Layer Access Code:
MO(1)(Momentary Switch): Activates Layer 1 only while the key is held down. The most common method.LT(1, KC_CAPS)(Layer Tap): Acts as a Momentary switch to Layer 1 if held down, but acts as a standardCaps Lockif tapped quickly. This is the ultimate tool for 60% layouts.
- Programming the Under-Layer: Navigate to Layer 1 in VIA (usually using the dropdown menu shown in image_20.png). Define the new functions for the keys that were covered by the Layer modifier on Layer 0.
The Deep Dive: QMK Configurator and Flashing
If you need functionality that VIA does not support (like complex RGB matrix controls or tap-dance keys), or if your board is QMK-compatible but lacks VIA support, you must use the QMK Configurator.
- Design the Layout: Use the online QMK Configurator (
config.qmk.fm). Select your keyboard model and design your base and sub-layers using the drag-and-drop interface. - Compile the Firmware: Click the “Compile” button. The configurator builds your
.hexor.binfirmware file on its servers. Download the compiled file. - Flash the Firmware (Using QMK Toolbox):
- Open QMK Toolbox.
- Select your downloaded firmware file.
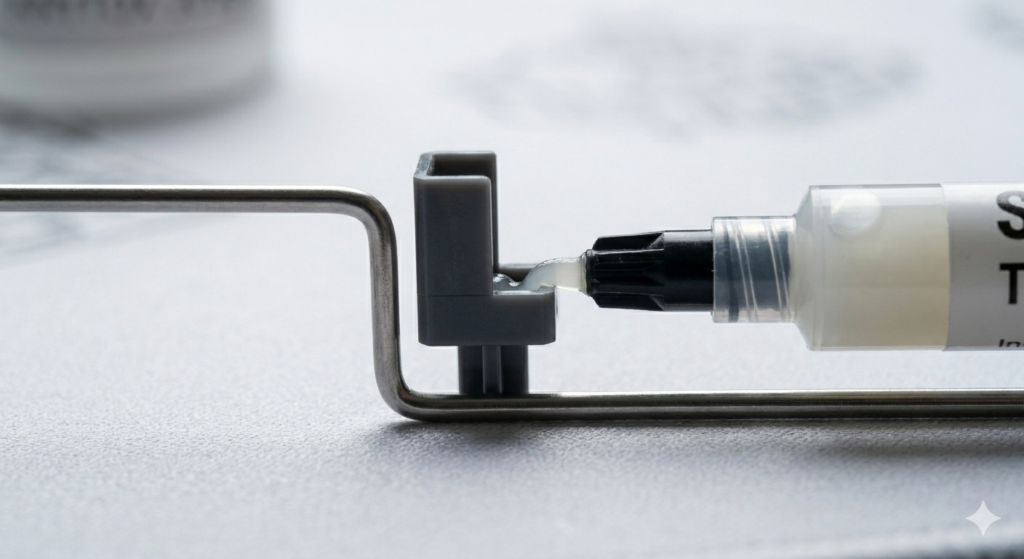
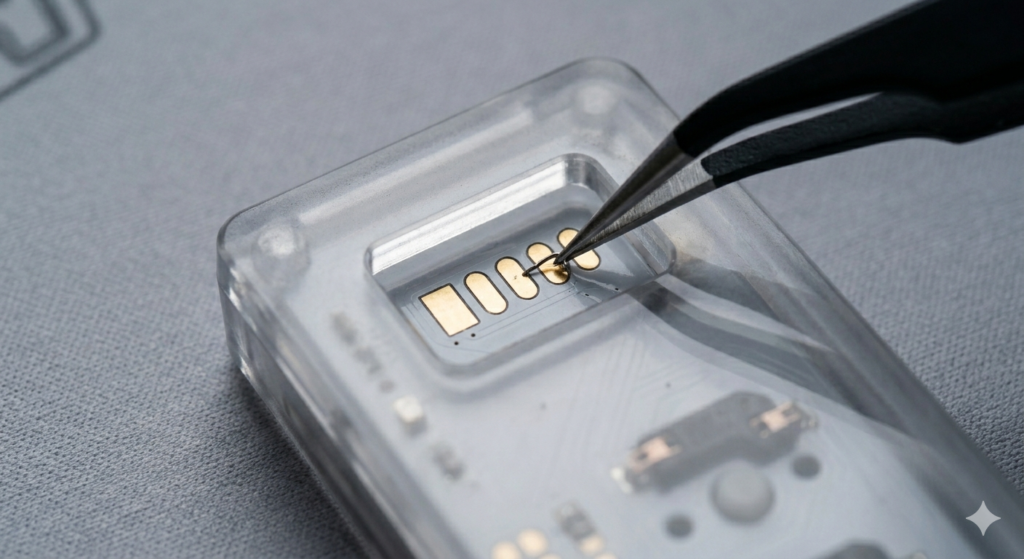
- Open your keyboard’s case bottom. Use precision tweezers (like those in image_1.png) to short the golden bootloader pads (as shown in image_22.png) while plugging the keyboard in. This forces the microcontroller into “bootloader mode.”
- Click “Flash” in QMK Toolbox. Do not unplug the keyboard until the process is complete.
Advanced Customization: Macros
Macros allow you to execute a complex string of keypresses with a single tap. Both VIA and QMK support macros.
- Programming the Macro (VIA Example): Click the “Macros” tab. Record a simple string (e.g.,
Hello!). Click save. - Assigning the Macro: In the remapping interface, assign a physical key to trigger
Macro 0. Now, pressing that key instantly typesHello!.
Read Also: How to Clean Your Mechanical Keyboard
Conclusion
Programming your keyboard’s layout is the logical recursion of custom ownership. While the initial build is about physical aesthetics and acoustics, the software configuration is about maximizing your workflow and digital efficiency.
Mastering thecompile-less convenience of VIA and the foundational power of QMK (including the flashing process shown in image_22.png) unlocks the full potential of your board.
Whether you are remapping a 65% layout (like image_20.png) or optimizing a 40% orthodontic layout, understanding layers, macros, and firmware flashing ensures your custom keyboard functions as well as it sounds.