A mechanical keyboard is an investment in your typing comfort and productivity. But like any high-use tool, it collects dust, skin cells, hair, and the occasional food crumb. While a simple wipe-down might keep the keycaps looking clean, ignoring the deep-seated debris lurking beneath the plate can lead to sticky switches, ghosting keys, and, eventually, complete electronic failure.
After maintaining and deep-cleaning custom boards for over seven years, I have seen the damage that water, generic household sprays, and improper disassembly can cause. This guide provides the exact safe-maintenance process I use to thoroughly clean a mechanical keyboard without compromising the integrity of its sensitive PCB (Printed Circuit Board).
The Danger of Incorrect Cleaning
Why can’t you just use window cleaner and a paper towel? Mechanical keyboards contain two sensitive electronic components: the hot-swap sockets (or soldered connections) and the PCB itself.
- Water Damage: Household cleaners and tap water contain minerals that can cause corrosion on the PCB’s copper traces if not dried instantly.
- Static Shock: Common plastic brushes and synthetic cloths can build up an Electrostatic Discharge (ESD). A single static spark can permanently “fry” a micro-controller on your keyboard’s PCB.
- Physical Damage: Forcing switches or stabilizers out improperly will crack the plate or damage the PCB pads, resulting in a dead socket.
Read Also: Which Switch is Right for You?
The Safe-Cleaning Tool Kit
Before you begin, gather these specific materials. Substitutions are risky when dealing with electronics.
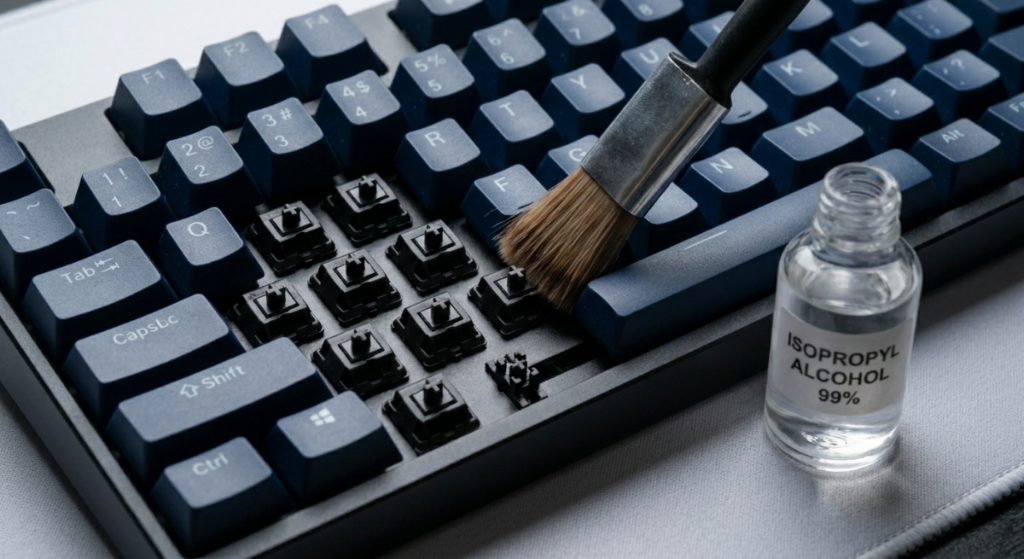
- 1. High-Purity Isopropyl Alcohol (IPA) (99% or 70%): Do not use water. IPA dissolves oils and grime without leaving residue. The 99% concentration (found in image_12.png) is ideal because it evaporates almost instantly.
- 2. ESD-Safe Cleaning Swabs or Microfiber Cloth: Never use cotton balls, as they leave fibers behind.
- 3. Keycap Puller & Switch Puller: Essential for safe, vertical removal without leveraging against the plate.
- 4. ESD-Safe Fine Brush: Used for removing dry dust between the switches.
Phase 1: Preparation and Disassembly (Hot-Swap Only)
Expert Warning: If your keyboard is soldered (not hot-swappable), do not attempt to remove the switches. You will limit your cleaning to the surface level.
- Disconnect and Unplug: Turn off your keyboard and remove the USB cable. This is non-negotiable for electronic safety.
- Document the Layout: Take a photo of your keyboard’s keycap layout before removal. This ensures a quick, error-free reassembly.
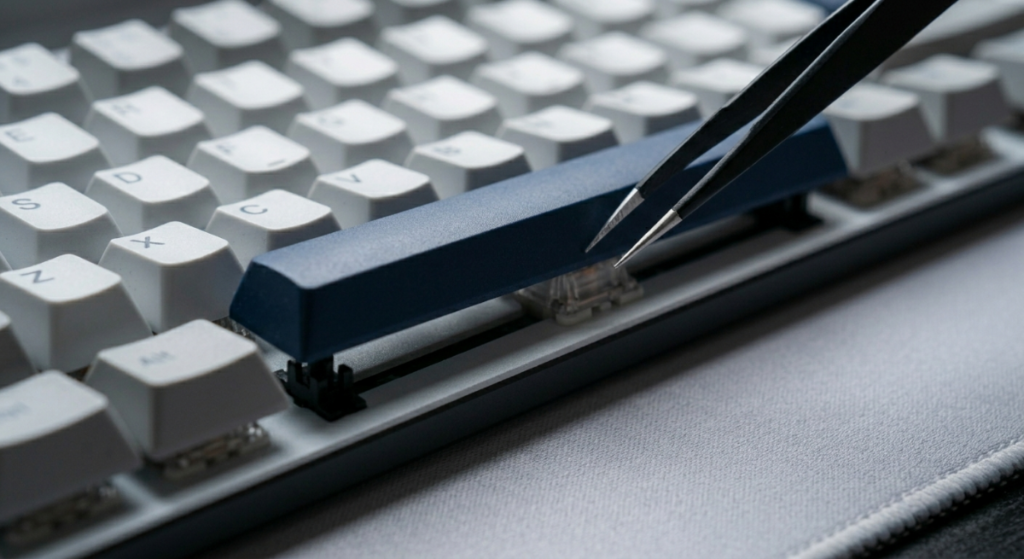
- Keycap Removal: Gently use your keycap puller to lift keycaps vertically. Avoid twisting them, which can strain the switch stem (like the dark linear stem in image_13.png). Place the keycaps in a large container of warm, soapy water.
- Switch Removal (Hot-Swap Boards only): Use your switch puller. Align the puller’s prongs with the release clips on the north and south side of the switch housing. Squeeze gently and pull straight up.
Phase 2: Cleaning the Hardware
- Cleaning the Keycaps: While the board is drying, agitate the keycaps in the soapy water. Use a toothbrush for stubborn grime. Rinse them thoroughly and lay them out to air dry. Critical Note: Ensure keycaps are 100% dry before reinstallation to prevent moisture from entering the switch housing.
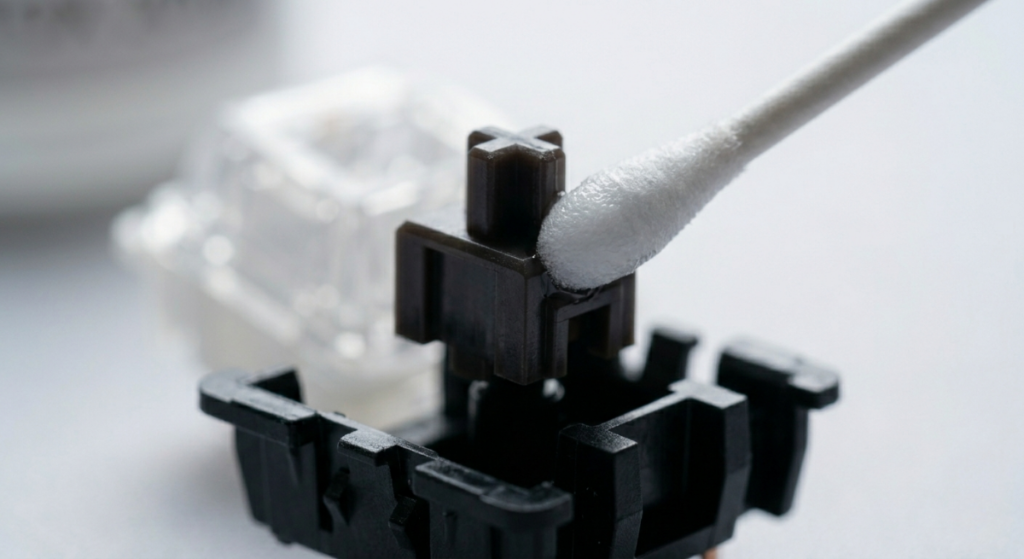
- Cleaning the Switches: For basic maintenance, use an ESD-safe brush to sweep dust away from the top housing. If a switch is sticky, apply 99% Isopropyl Alcohol to a cleaning swab and gently clean the stem rail. For internal switch maintenance, see our dedicated Switch Lubing Guide.
Phase 3: Cleaning the Case and Plate (The Deep Clean)
With the keycaps and switches removed, the plate and case are exposed.
- Dusting: Flip the keyboard upside down over a trash can and gently tap the back of the case. Use an ESD-safe brush to remove loose debris from the plate and switch sockets.
- Grime Removal: Dampen an ESD-safe swab or microfiber cloth with high-purity Isopropyl Alcohol. Wipe the plate and case. If grime has collected inside a hot-swap socket, gently clean the entrance with a damp swab. Do not force the swab into the socket.
Phase 4: Safe Reassembly
Once all components (keycaps, plate, case) are completely dry, you are ready to reassemble.
- Reinstalling Switches: Ensure the two metal pins on the bottom of the switch are straight. Misaligned pins will buckle when you press the switch in, damaging the hot-swap socket. Line the switch up over the socket and press down firmly until you hear the distinct click of the clips engaging.
- Reinstalling Stabilizers: If you removed them, check that your stabilizers are properly aligned and tuned.
- Reinstalling Keycaps: Reference your layout photo from Phase 1. Align each keycap over its respective switch and press down firmly.
Read Also: The Best Way to Fix Rattly Stabilizers and Spacebar Rattle
Conclusion
Deep cleaning your mechanical keyboard is more than an aesthetic necessity; it is a critical component of electronic maintenance.
By using the proper, non-conductive solvents and ESD-safe tools, you remove harmful debris without risking the delicate connections on the Printed Circuit Board.
While it may seem intimidating to fully disassemble your board, following this precise method ensures your investment remains responsive, reliable, and smooth for years to come.

Vipul is a digital entrepreneur with a deep specialization in hardware optimization and web ecosystem management. With years of experience in the SEO industry and a passion for mechanical keyboard architecture, Vipul personally researches, tests, and writes every guide found on this site.