Mechanical keyboard enthusiasts often describe the feeling of a “stock” (unlubed) switch as “scratchy” and the acoustic signature as “pingy.” After building over 50 custom keyboards, I can confidently state that lubing your switches is the single most impactful modification you can make to your typing experience.
It’s a tedious process, often taking anywhere from 2 to 4 hours for a full-size keyboard (104 switches). However, the results are undeniable: a smoother keypress, reduced scratchiness, and that satisfying, deep acoustic “thock.” This guide provides the exact method I use to achieve consistent, professional results without over-lubing.
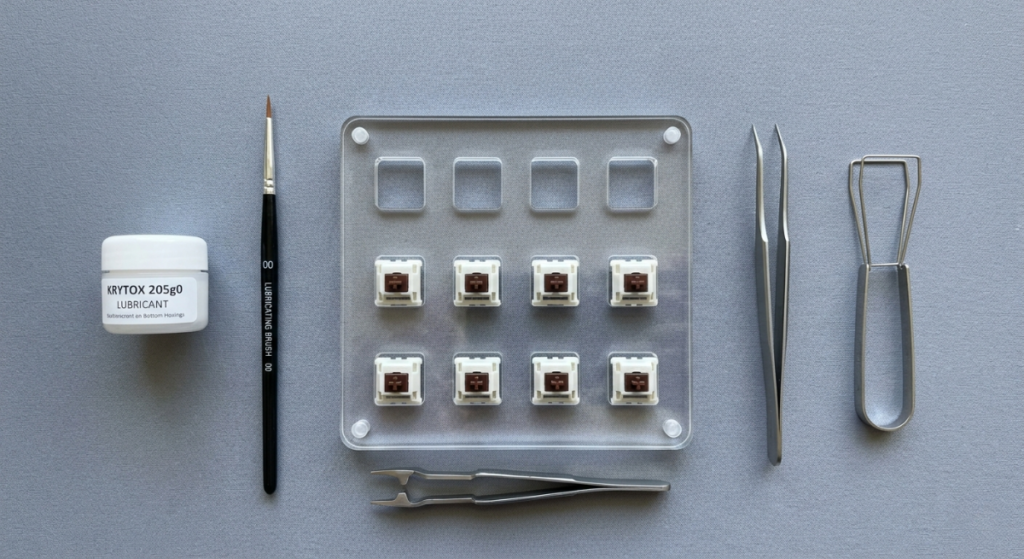
The Essential Lubing Tool Kit: What You Actually Need
Before you begin, do not substitute these items. I have tried improvising with generic lubricants and makeup brushes; it always ends in a messy, inconsistent switch that must be cleaned and restarted.
Read Also: The Ultimate Guide to Keyboard Mounting Styles
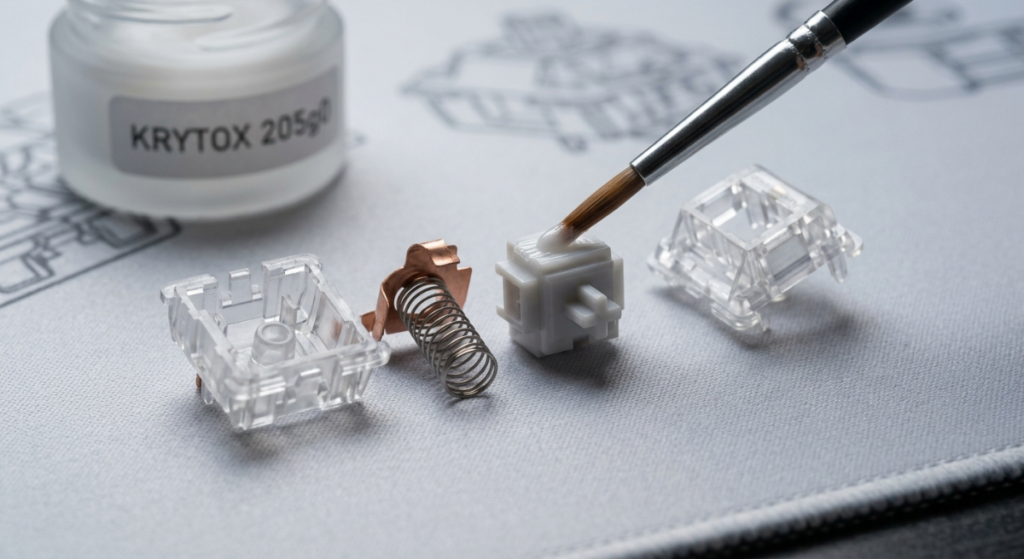
- 1. Lubricant (The Most Critical Choice):
- Krytox 205g0: My top recommendation for linear switches. It is thick, consistent, and provides that signature “smooth as butter” feel.
- TriboSys 3203: Ideal for tactile switches. It is slightly thinner, meaning it will improve smoothness without muting the tactile “bump” that defines the switch.
- 2. Applicator Brush: A very fine brush (sizes 0, 00, or 000). A high-quality brush is crucial for controlling the precise amount of lubricant.
- 3. Switch Opener: Do not use tweezers or a screwdriver to open switches; you will damage the plastic clips or the housing. Ensure your opener works with your specific switch type (MX, Kailh, etc.).
- 4. Stem Holder or Reverse Tweezers: This allows you to hold the small stem component without getting your fingers covered in lubricant.
- 5. (Optional but Recommended) Lubing Station: A simple acrylic plate with cutouts to hold the switch components. It keeps you organized and prevents lost springs.
Preparation: How to Open the Switches Safely
- Removal: Ensure your keyboard is hot-swappable before pulling the switches. If it is soldered, you will need to desolder them first (a advanced process that requires a dedicated guide). Use a specialized switch puller, not a keycap puller, to remove switches to avoid damaging the hot-swap sockets.
- Organization: Place your dissembled parts (Top Housing, Bottom Housing, Stem, and Spring) into separate containers or onto your lubing station. Organization is key to ensuring consistent application across 80+ switches.
Step-by-Step: The Correct Lubing Technique
The golden rule of lubing is less is more. You can always add more lube, but removing it is almost impossible without ultrasonic cleaning. Over-lubing results in a mushy, sluggish, and unresponsive switch.
1. Lubing the Bottom Housing
Using your fine brush, apply a minuscule amount of lubricant. When you look at the brush tip, you should barely see the white of the lube. Focus the application only on the internal “sliders” or “rails”—the vertical channels where the stem will travel. Do not apply lube near the metallic contacts (the leaf), as this can cause “chatter” (double-typing errors) or connection failures.
2. Lubing the Spring
The goal here is to stop the metallic “ping” sound when the key ascends. You can manually brush the top and bottom of each spring, but I recommend “bag lubing” for efficiency. Place all springs in a sturdy plastic bag, add 3–5 drops of a thinner lubricant (like Krytox 105 oil), seal the bag, and shake vigorously for 2 minutes. This provides an even, efficient coat on every spring.
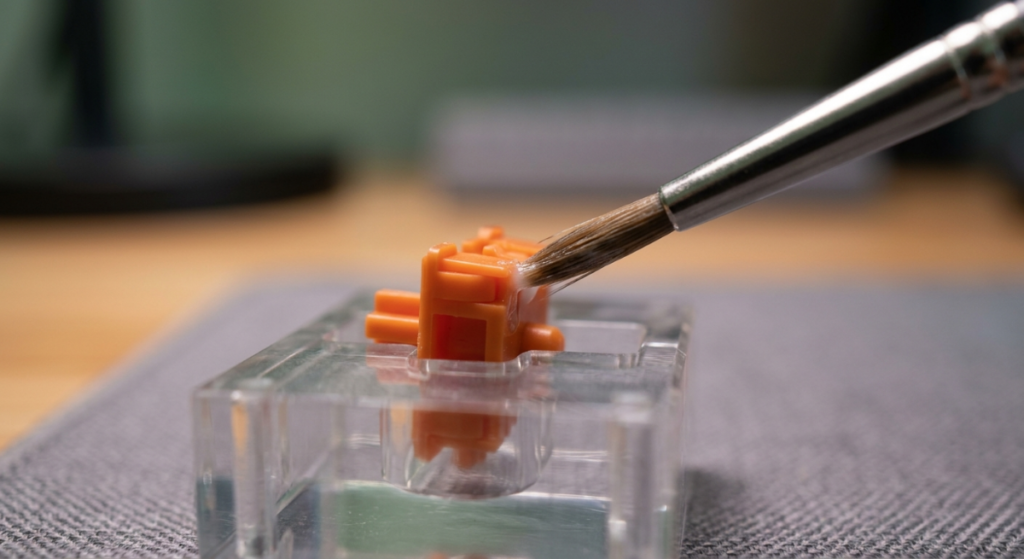
3. Lubing the Stem
This is the most critical step for achieving smoothness. Use your stem holder to grip the stem securely. Apply a thin, even coat of lubricant to the four flat sides (sliders) of the stem.
- Crucial Note for Tactile Switches: If you are lubing a tactile switch (like Holy Pandas, Boba U4t, or Brown switches), do not lube the “legs” of the stem. The legs are the two small protrusions that contact the leaf to create the tactile “bump.” Lubing them will make your tactile switch feel like a muddy linear switch.
4. Reassembly and Quality Control (QC)
Place the spring back into the center post of the bottom housing. Place the stem (ensuring it is oriented correctly toward the leaf) onto the spring. Align the top housing correctly and press down firmly until you hear a distinct “click,” signaling the four clips have engaged securely. Before installing the switch back into your keyboard, actuate it manually with your thumb. Listen for metallic ping or scratchiness, and ensure it resets quickly without mushiness.
Watch Video For Help
Pro-Tip: The “24-Hour Rule”
After completing a full lubing session, I recommend letting the switches rest for at least 24 hours. The lubricant needs time to settle and even out within the housings. Your typing experience 24 hours later will be slightly different—and usually significantly better—than immediately after reassembly.
Read Also: Replace a Broken Mechanical Switch
Common Beginner Mistakes to Avoid
- Too Much Lube: This is the most frequent mistake. It makes the switch feel sluggish and reduces the acoustic clarity. If you see visible globs of white lube inside the switch housing, you have used too much.
- Lubing Tactile Legs: As mentioned, this ruins the tactile experience. Avoid the legs entirely unless you are an advanced user experimenting with sound profiles.
- Inconsistency: Try to apply the exact same amount of lubricant to every single switch. Inconsistent switches make the keyboard feel strange and unfamiliar to type on.
- Using the Wrong Tool for Opening: Forcing open a switch housing without a proper opener will deform the plastic, potentially causing the clips not to engage properly when you try to reassemble it, resulting in a wobbly switch.
Conclusion
While lubing mechanical switches is undoubtedly time-consuming, the transformation is undeniable. It converts a budget-sounding mechanical keyboard into a smooth, refined typing instrument that sounds as good as it feels. If you value acoustics and smoothness in your setup, this is the first modification you must try.

Vipul is a digital entrepreneur with a deep specialization in hardware optimization and web ecosystem management. With years of experience in the SEO industry and a passion for mechanical keyboard architecture, Vipul personally researches, tests, and writes every guide found on this site.